Reviewing and Managing Items
This example summarizes and walks you through some of the common functionality that is available in many parts of the GUI:
- Reviewing items in the managed environment such as keys and authorizations.
- Sorting keys and authorizations.
- Performing actions on one or more keys.
-
In previous examples, we added some authorizations between users. Authorizations can be reviewed on the User keys→Authorizations page.
-
You can review private keys and authorized keys individually. To see the private keys, navigate to the User keys→Private keys page.
-
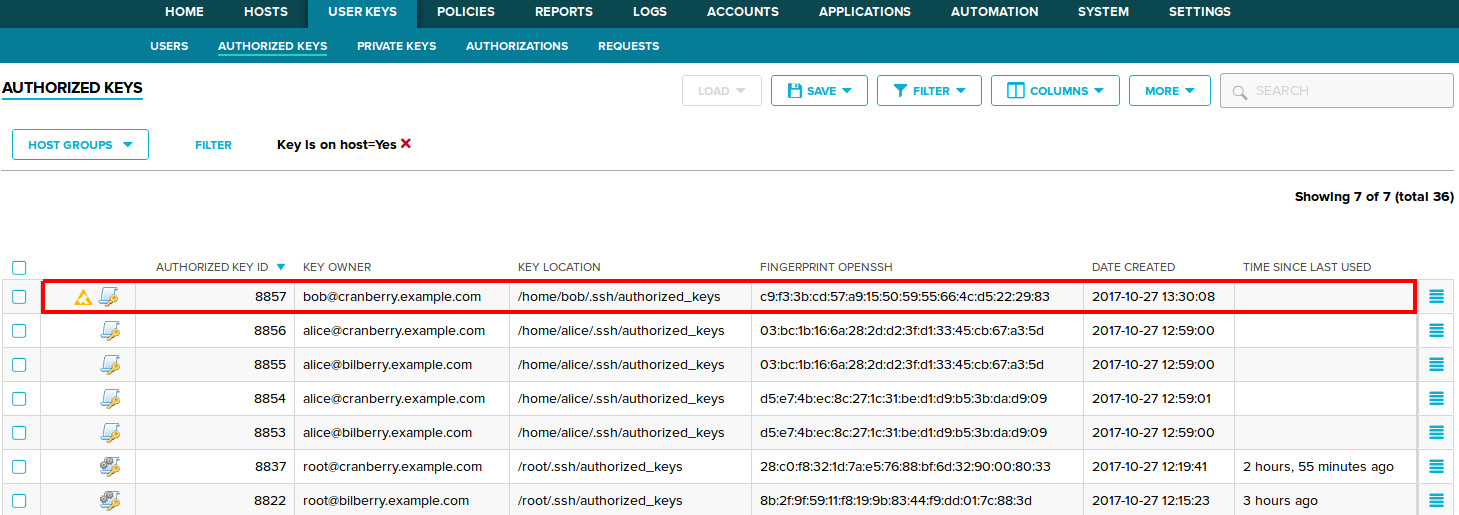
Similarly, to see the authorized keys, navigate to the User keys→Authorized keys page.
-
To display additional information about an individual key, click its row (though not its checkbox, nor its action menu):
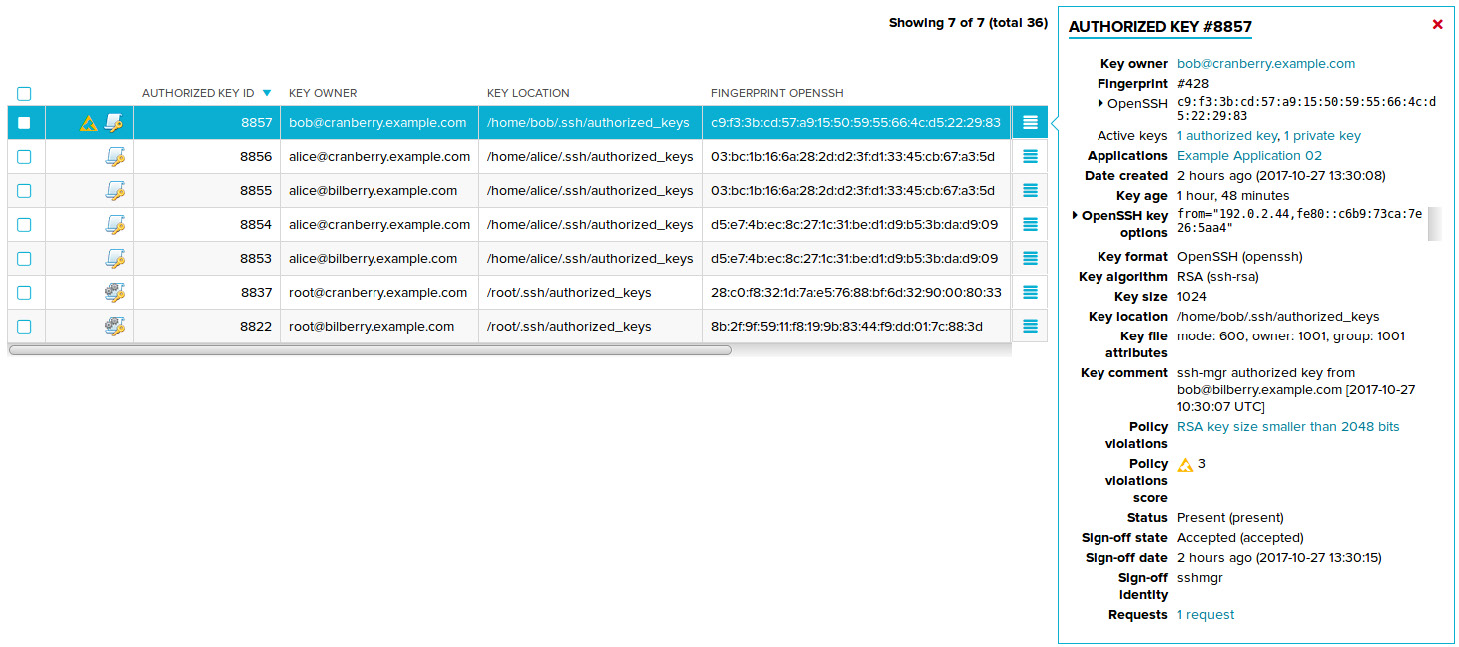
Click the item again to hide the details panel.
-
You can use filters to search for keys and authorizations that match specific criteria. For example, searching for keys/authorizations belonging to a certain user, searching for keys/authorizations that are cryptographically weak or otherwise against your security policy, and so on.
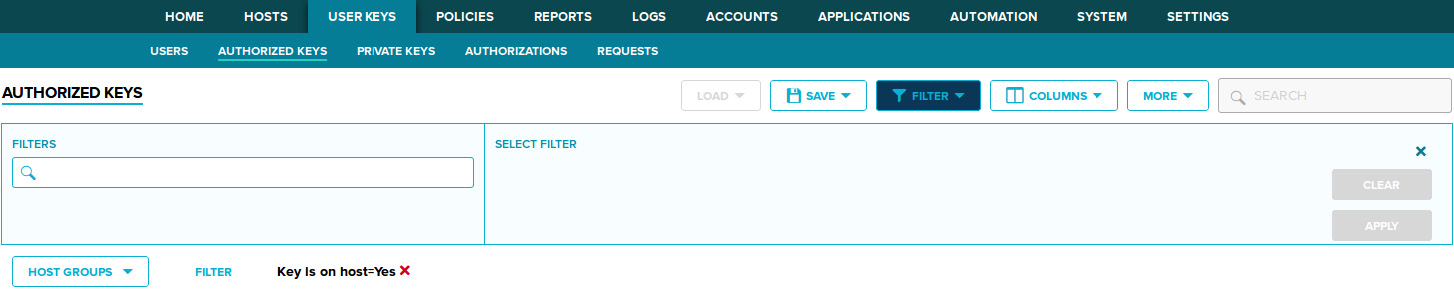
Click Filter to display the filter panel:
-
In the filter panel, start specifying a filter by providing a value to the Filters field. When you click the field, you are given a list of filters you can set. You can specify a filter by selecting it from the list, or by directly typing it into the Filters field. For this example, select or type the Hostname filter, then set its value to the name of one of your test hosts.

Click Apply to apply the filter. Notice that your currently-applied filters are displayed below the filter panel. Also observe that only those keys that are on the specified host are displayed.
-
You can remove the filter by clicking the ✖ next to it.
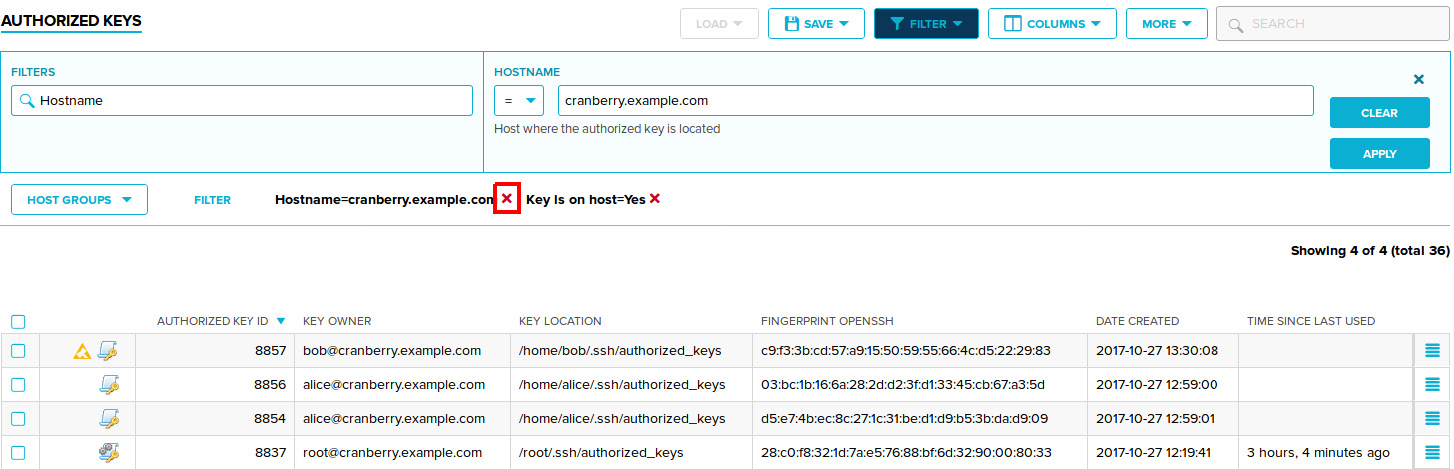
After you remove the filter, keys on other hosts are once again displayed.
-
A list entry must match all the applied filters for it to be visible. To test multiple filter conditions, we shall define filters to display authorizations from a specific source user to a specific destination user.
First, navigate to the User keys→Authorizations page, where all the authorizations are displayed.
Observe the listed authorizations.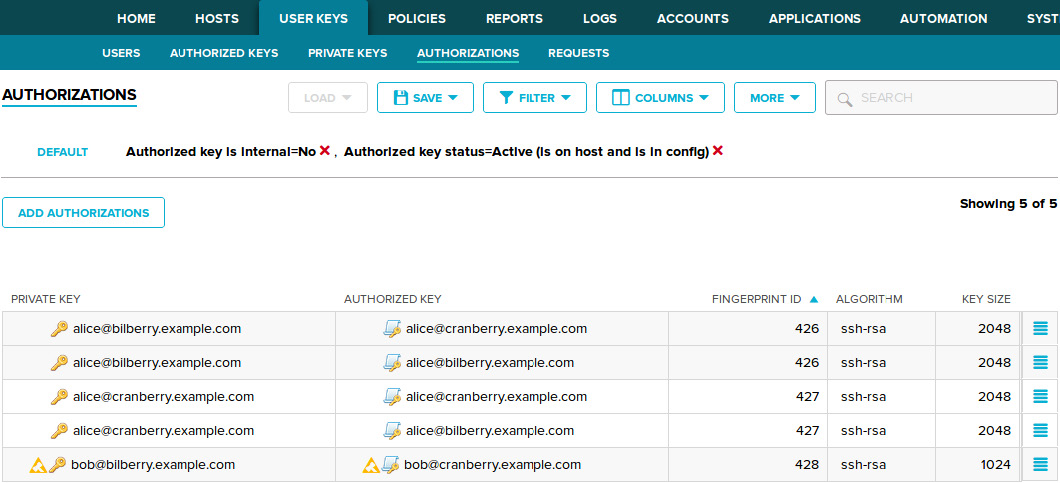
An authorization consists of a private key and an authorized key, respectively located on the source account and the destination account. To filter by a specific account, you must define both its user name, and its host. With this in mind, we need to define the following filters to find authorizations that are from a specific source account to a specific destination account:
- Private key username: The source-account user name
- Private key hostname: The name of the host where the source account is located.
- Authorized key username: The destination-account user name
- Authorized key hostname: The name of the host where the destination account is located.
Your final filters should look somewhat similar to the following:
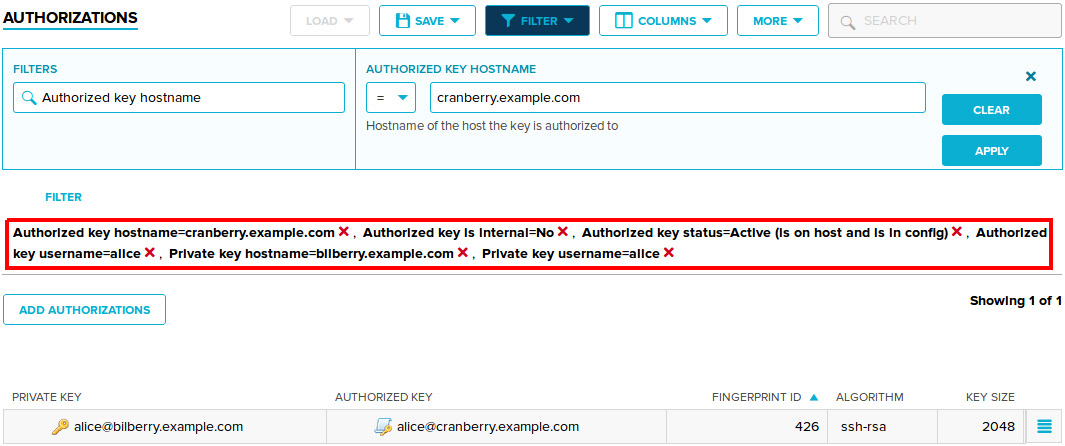
Observe that the authorizations list only displays those authorizations that are from the specified source account to the specified destination account.
-
Return to the User keys→Authorized keys page.
To sort a list, click the column you want to sort the list by. For example, to sort authorized keys by their Authorized key id, click Authorized key id in the list header:

Note that clicking the same header again reverses the sort order.
-
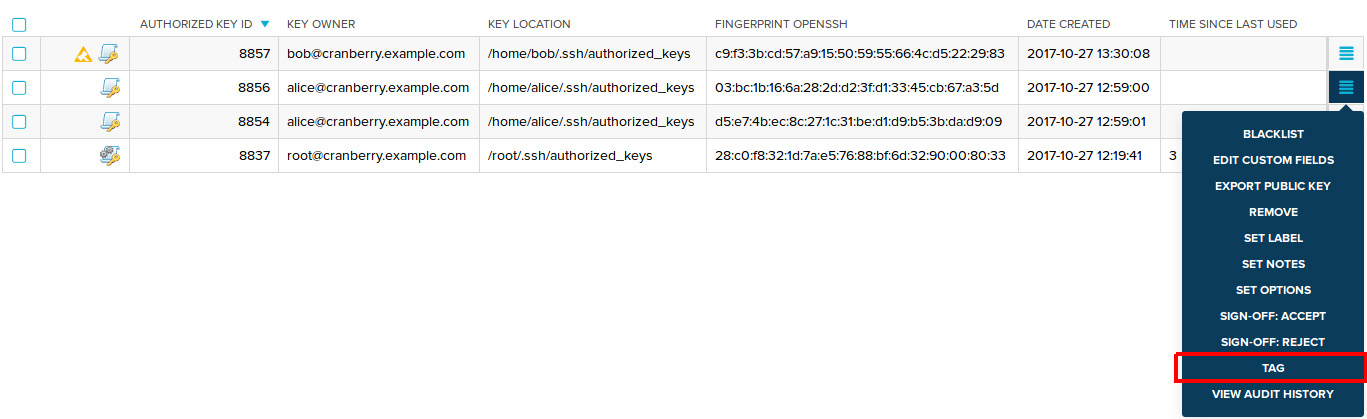
For most types of listed items, you can perform a variety of management actions (often referred to just as actions). To perform an action on a single item, click the action menu. Make sure to click the action menu that is associated to the item you want to perform the action on.

Doing so displays the list of actions that are available for the specific item. In this example, we click Tag, to tag the selected keys.
Doing so displays the dialog for the Tag action:
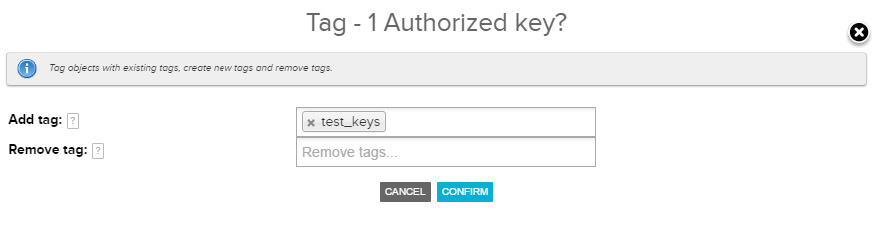
In the dialog, specify some arbitrary tag(s) under the Add tags field, then click Confirm to add these tags to the selected keys.
-
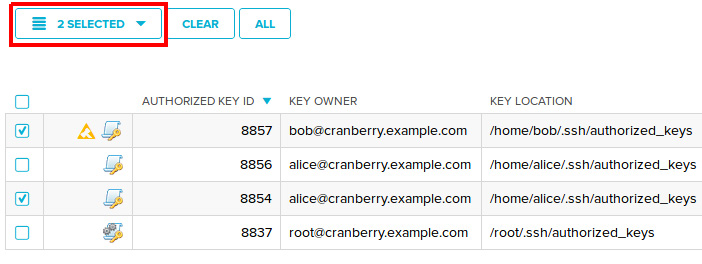
In the Key Manager GUI, it is also possible to perform an action on multiple keys at a time. To do this, select one or more keys in a list (by clicking their checkboxes). Doing so displays the selection menu over the list.
-
To perform an action on all the selected keys, click the selection menu, then in the selection menu, click the action you want to perform. For the purposes of this example we shall perform a Tag action again. Specify tags and confirm the action similarly as before.
-
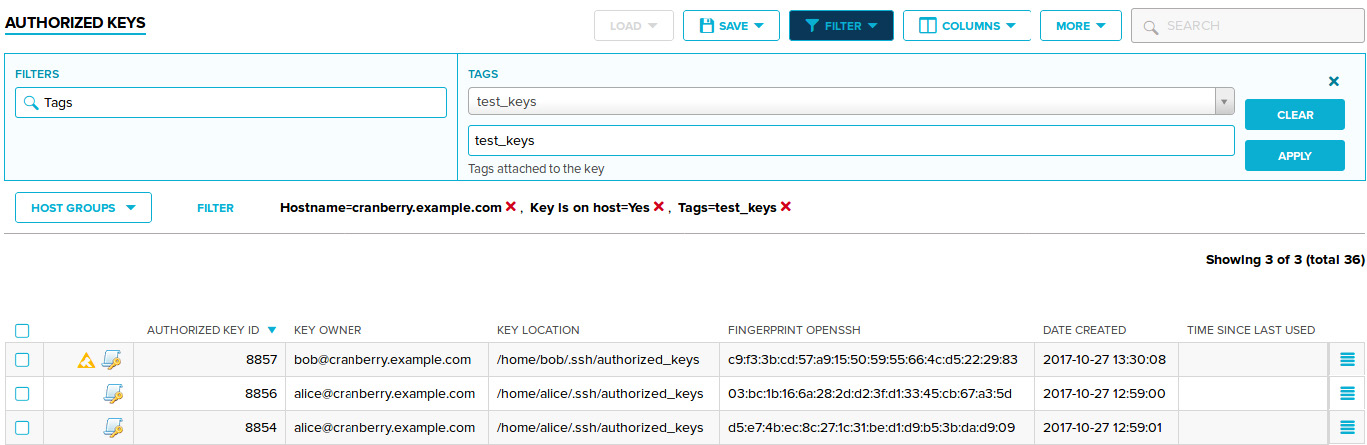
You can then find the previously tagged keys using filters:
-
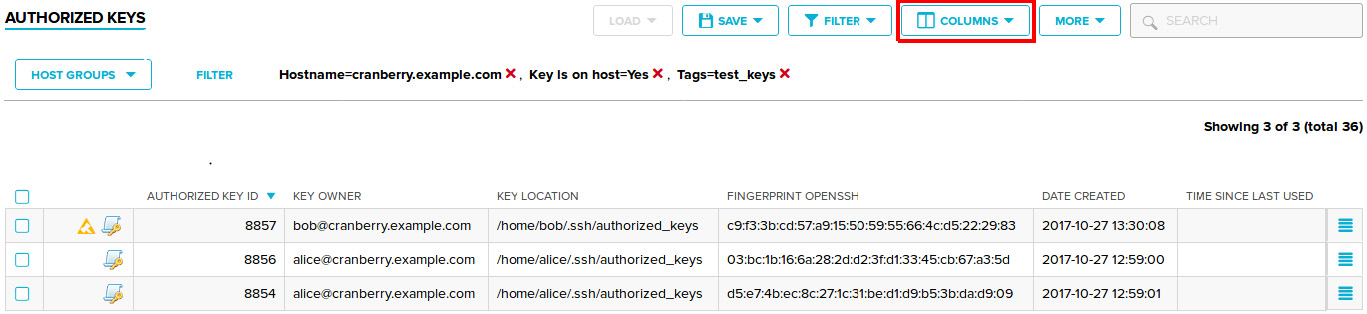
The GUI does not display all the available columns by default. To display or hide additional columns in a list, click Columns.
Then specify the columns you want to display. In this example we select Tags from the Available columns section. After you have selected the column, it should be displayed in the Selected columns section of the dialog.
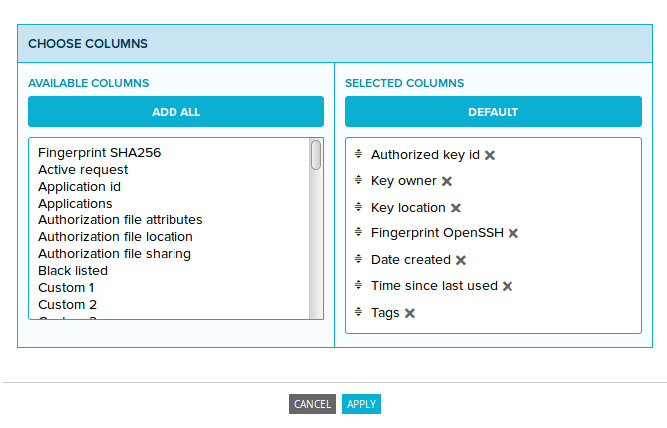
Click Apply to save your changes. You should now be able to see the tags we set earlier. Note that you may need to scroll right in the list to see the Tags column.

The tasks that we performed on list items in this example are applicable to most types of list items in the GUI:
-
Clicking an entry displays its details panel, which contains additional information about the item.
-
To perform an action on a single item, select the desired action from the action menu that is associated to the list item (the
 located at the right side of the list item).
 -
Checking one or more items displays the selection menu above the entire list. When you select (and confirm) an action via the selection menu, the action is performed for all the selected items.
-
Selecting an action (either via an action menu or a selection menu) displays the action dialog. You will need to confirm the action via the dialog. Many types of actions will ask for additional information via their action dialog.